Software Development Kit
Training tutorial
mpVision SDK allows you to integrate your own ML models training processes to extend existing capacities of the application. To facilitate this integration, the SDK offers a suite of functions designed to encapsulate your training code into mpVision training engine.
When user creates a training session with their annotated dataset it will be added to a training sessions queue. mpVision backend is able to monitor that queue, pull data from it and initiate a training process within a pre-defined training engine.
To implement your custom training engine only thing you have to do is to utilize functions provided from SDK to retrieve training datasets, report metrics and store training process results in your model training code. That set of functions will enable you to wrap your process into an isolated Docker image forming a training engine that is pluggable to mpVision application. When you done implementing and testing your training process, using the console interface of mpVision you will be able to configure scheduler to use registered Docker image to initiate training processes within mpVision ecosystem.
Retrieving dataset images and corresponding annotations
Through the pages of this tutorial we will implement an object detection training engine using resnet101 model and FastAI framework. We will use Blood Cell Detection dataset since it already has annotations and is available online.
For this tutorial we will assume that user uploaded those images to mpVision and annotated them, the UI might look like this:
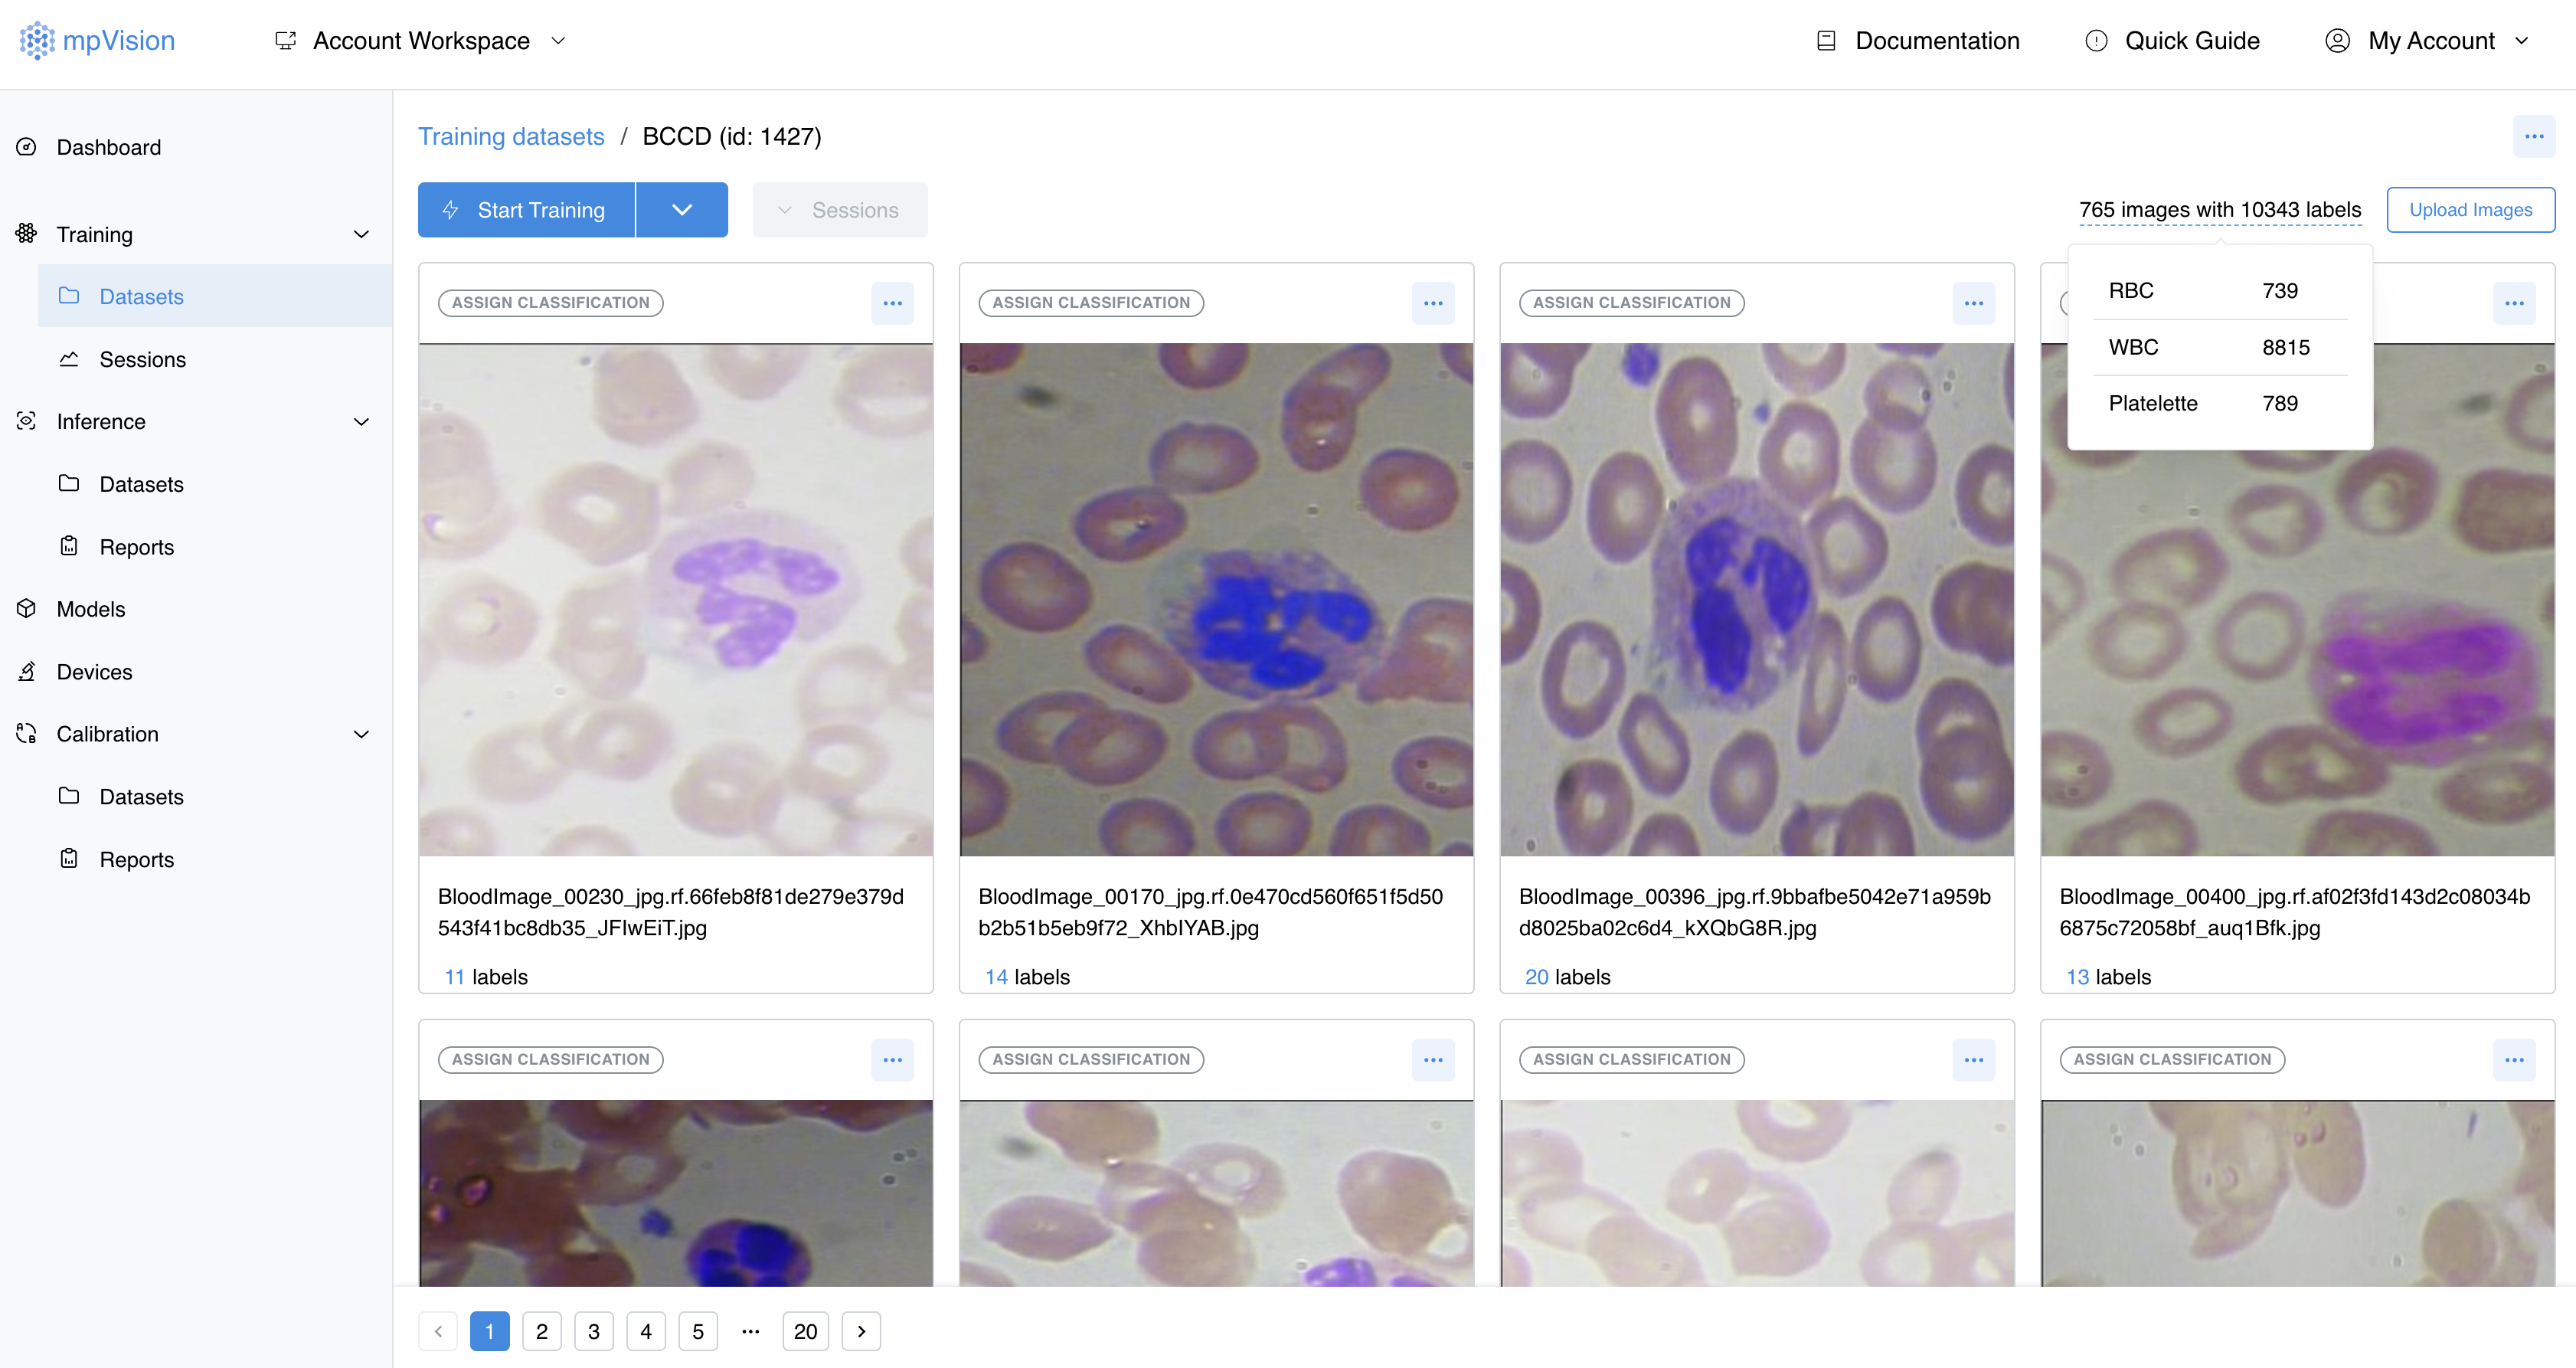
Now, when user initiates a training session by clicking on "Start Training" button we will be able to access that dataset images and corresponding annotations. For that purpose we will use mp_sdk.training.get_session function. It retrieves next available training session in the queue, downloads related images and annotations and returns TrainingSession object.
from mp_sdk import training

session = training.get_session(dataset_id=1427)
Now, through session object when we have access to the dataset and we can utilize its images with annotations for our custom training process. Returned session object already contains validation/training split that is requested by user from mpVision, we can access them from corresponding properties:
from mp_sdk import training

session = training.get_session(dataset_id=1427)

validation_images = session.validation_images
training_images = session.training_images

# Print image id and other related properties
for image in validation_images:
    print(image.id, image.path, image.url, image.pil_image)
Validation and training images are returned as a list of mp_sdk.Image objects, each of which has annotations that are assigned to the image (including whole image classification, we will have a look at them later in the "Image Classification" tutorial). But for now we will be interested in PIL images and corresponding annotations:
from mp_sdk import training

session = training.get_session(dataset_id=1427)

validation_images = session.validation_images
training_images = session.training_images

for image in validation_images:
    pil_image = image.pil_image
    annotations = image.annotations
    # Add to our validation images set

for image in training_images:
    pil_image = image.pil_image
    annotations = image.annotations
    # Add to our training images set
You might notice that annotations refer to a label_id — it is mapped to annotation_labels dataset property which contains annotation labels title, color and other related information:
from mp_sdk import training

session = training.get_session(dataset_id=1427)

validation_images = session.validation_images
training_images = session.training_images


for image in validation_images:
    pil_image = image.pil_image
    annotations = image.annotations
    # Add to our validation images set

for image in training_images:
    pil_image = image.pil_image
    annotations = image.annotations
    # Add to our training images set

annotation_labels = session.annotation_labels
# Register annotation labels
As you can see, you do not have to worry about downloading images and formatting annotations to popular annotation formats (YOLO, COCO and etc, full list of supported formats can be found here), SDK functions will handle it for you — they will retrieve images, download them, convert to PIL images and return you structured data which you can use to initiate training process (you can also access directly to downloaded image files using Image.path property). Now, we are able to initiate our training process:
from mp_sdk import training

dataset = training.get_session(dataset_id=1427)

validation_images = session.validation_images
training_images = session.training_images


for image in validation_images:
    pil_image = image.pil_image
    annotations = image.annotations
    # Add to our validation images set

for image in training_images:
    pil_image = image.pil_image
    annotations = image.annotations
    # Add to our training images set

annotation_labels = session.annotation_labels
# Register annotation labels

# Initiate training process
for step, model in enumerate(torch.dataset):
    # Your training loss functions and validation
    # logic goes here
    results = model.run()
    print(results.loss, step)
Reporting training metrics
In the previous example we are just printing our metrics to the console, which is useful, but hard to track for future use-cases and sharing reliably across other team members. Using the SDK we are able to report those metrics to reflect them in the training session chart and display them with corresponding validation images:
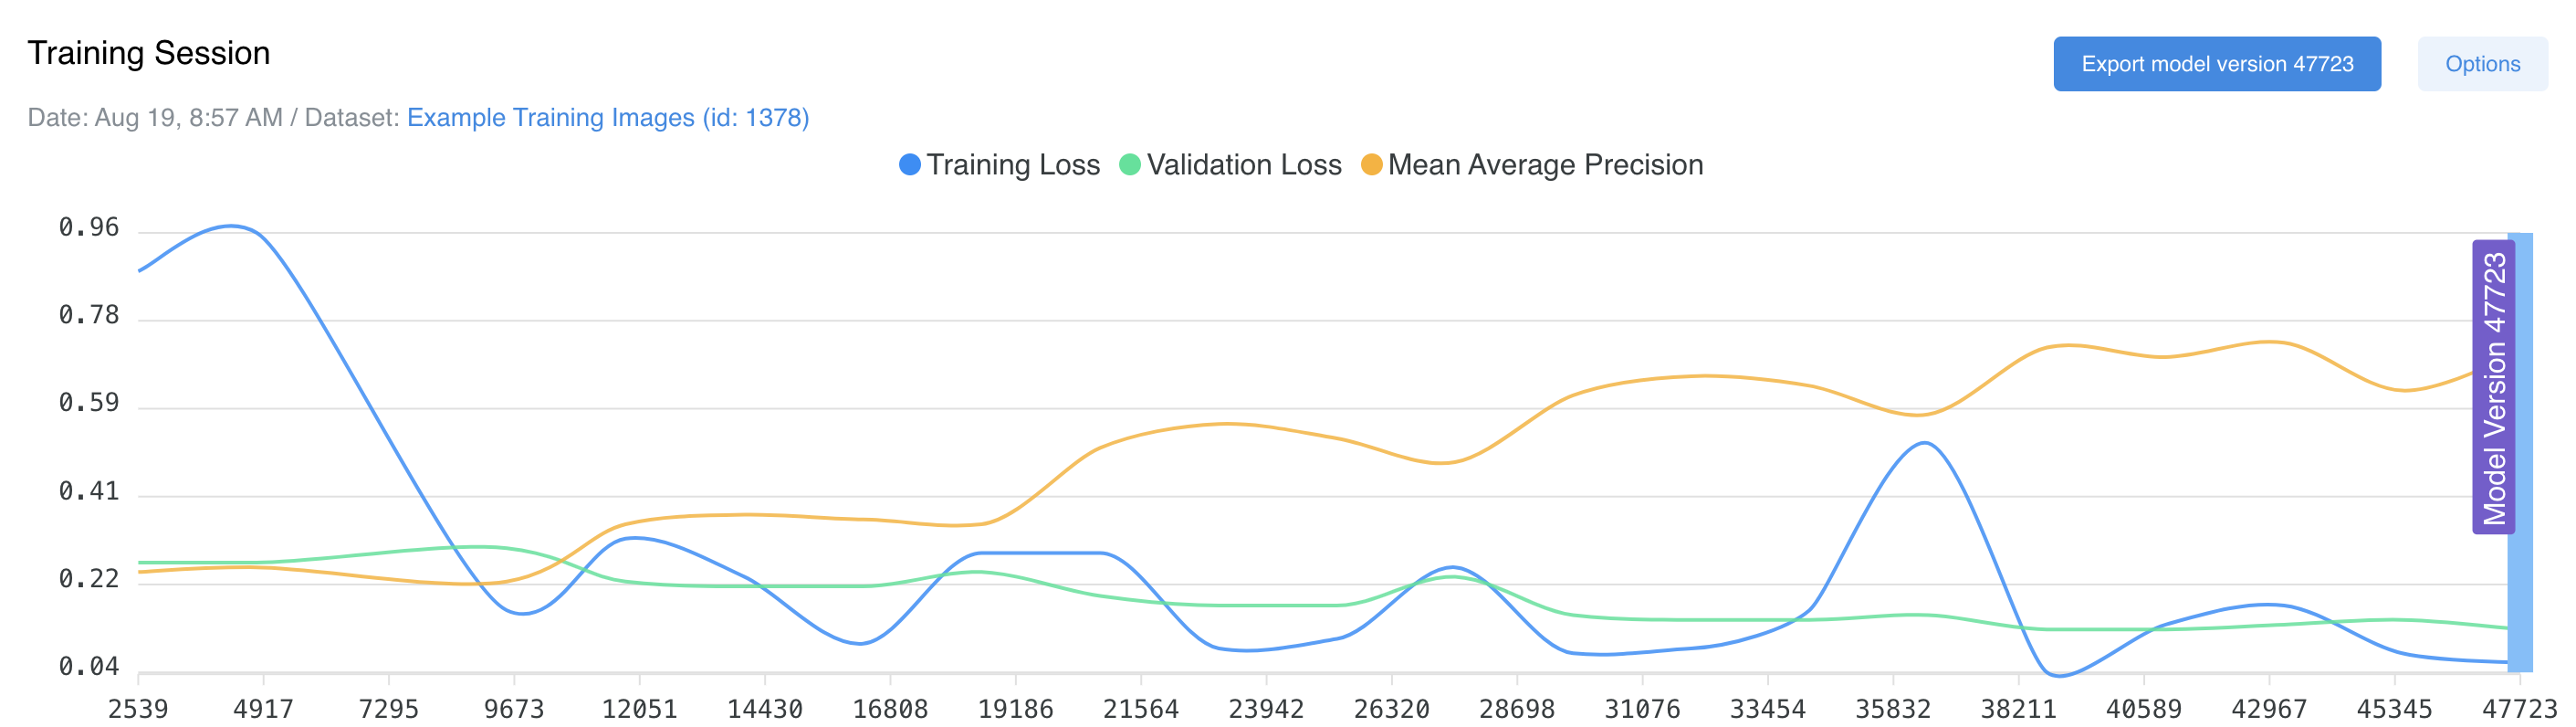
Training session object has TrainingSession.save_metrics function, which accepts list of dictionaries containing key-value pairs that you would like to store. Dictionary has to have at least two key-values, one of each is the current step — numeric integer value, and the other one should be the value you are actually willing to store. In our example we need to store three variables related to the current training step: training and validation losses with precision output. Let's use our function:
from mp_sdk import training

session = training.get_session(dataset_id=1427)

validation_images = session.validation_images
training_images = session.training_images


for image in validation_images:
    pil_image = image.pil_image
    annotations = image.annotations
    # Add to our validation images set

for image in training_images:
    pil_image = image.pil_image
    annotations = image.annotations
    # Add to our training images set

annotation_labels = session.annotation_labels
# Register annotation labels

# Initiate training process
for step, model in enumerate(torch.dataset):
    # Your training loss functions and validation
    # logic goes here
    results = model.run()

    print(results.loss, step)

    # Save training metrics within mpVision data storage
    session.save_metrics([
        {
            'step': step,
            'training_loss': results.loss,
        },
        {
            'step': step,
            'validation_loss': results.validation_loss,
        },
        {
            'step': step,
            'mean_average_precision': results.mean_average_precision
        },
        # .... any other metric you want to store ...
    ])
session.complete()
As you can see in example above, only thing you need to worry about is sending any metric type with TrainingSession.save_metrics function, mpVision backend will handle sorting of that data and aggregating it to a metrics chart.
You can find full reference and data type descriptions for metrics reporting function here. For now, let's see how we can work with validation images.
Validation images output
During the training process, if you have used the validation/training images split, it is a common practice to run your model inference over them and calculate corresponding metrics (for example, validation loss from previous example). As well as you might want end users to see the visual output of validation images with assigned classifications for detected objects. In that way, users are fully aware not only about numerical output, but also are able to visually see how model perform on certain images at selected training step.
mpVision provides interface for both types of tasks, image classification and object detection. Images will be shown right bellow the metrics chart with description of outputs. For now we are focusing on object detection outputs that looks like this:
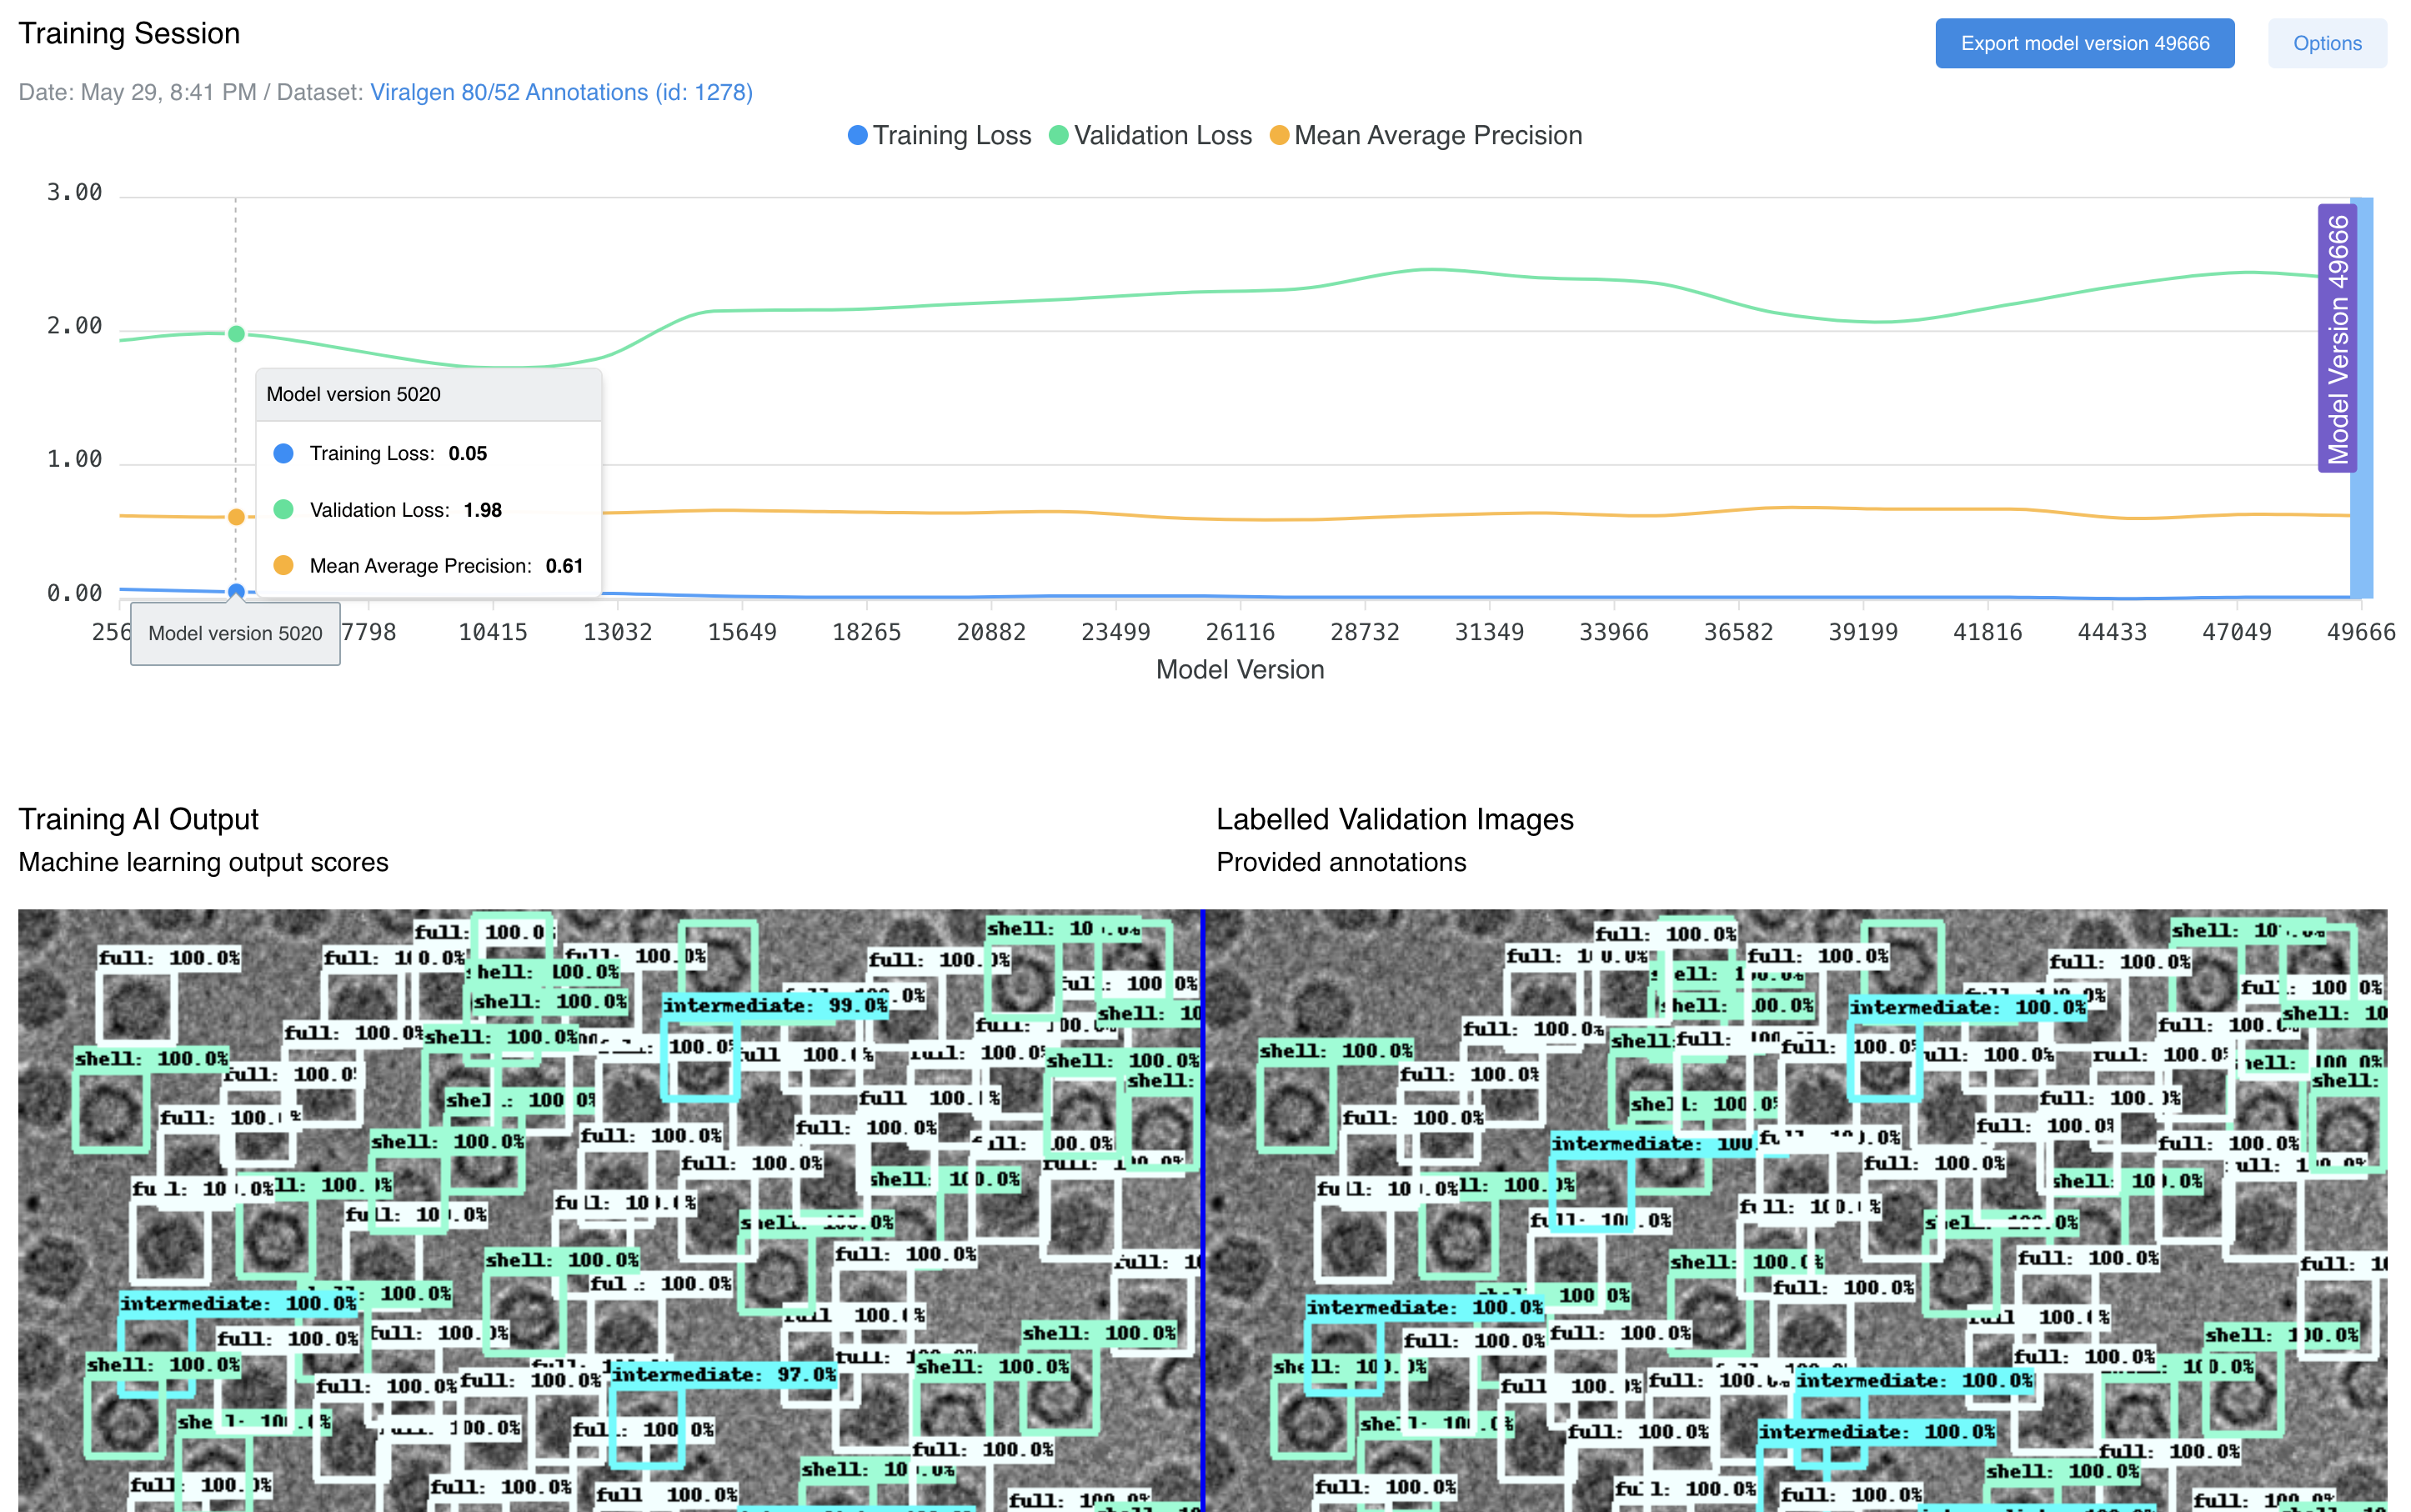
To save validation images run output within mpVision, you can use mp_sdk.training.save_validation_images function that provides interface for submitting inference results for corresponding step. In current example we have outputs produced as bounding boxes with classification label assigned to them. Let's import that function and report that data:
from mp_sdk import training
# .... Your code here

# Initiate training process
for step, model in enumerate(torch.dataset):
    # Your training loss functions and validation
    # logic goes here
    results = model.run()
    training_loss = calculate_training_loss(model)
    save_training_metrics([
        {
            'step': step,
            'training_loss': training_loss,
            # Add exportable flag to allow users to export this model version
            # to their models library.
            'exportable': (step != 0) and (step % 100 == 0)
        },
        {
            'step': step,
            'validation_loss': results.validation_loss,
        },
        {
            'step': step,
            'mean_average_precision': results.mean_average_precision
        },
        # .... any other metric you want to store ...
    ])

    validation_images_batch = list()
    for image in model.validation_images:
        validation_results = model.run(image)
        validation_images_batch.append({
            # Validation image id
            "image_id": image.id,

            # Current training step
            "step": step,

            # List of detections
            "detections": [
                {
                    # Label id from dataset.annotation_labels
                    "label_id": res.label_id,

                    # Bounding box of current detection
                    "bounding_box": res.bounding_box,
                }
            ]
        })
    training.save_validation_images(validation_images_batch)
As coordinates for output detection, function accepts two dictionary values: bounding_box and contour. Bounding box should contain coordinates in relative units (0 to 1) and should be in [top_x, top_y, bottom_x, bottom_y] format, for example [0.4, 0.3, 0.6, 0.5]. Contour values should be provided in the same relative units, but should contain list of (x, y) tuples, for example [(0.1, 0.1), (0.3, 0.3), (0.35, 0.37)...]. If you provide contour only, the bounding box will be calculated based on it and you can skip it. But you should provide at least bounding box if you do not have contour data, otherwise function will throw exception. You can find more details and usage examples of this function here.
In cases when you need to provide provide generated image, you can use image_path key if you have it stored locally or pil_image key if you have it saved in memory:
# ... above example code here ...
validation_images_batch = list()
for image in model.validation_images:
    validation_results = model.run(image)
    validation_images_batch.append({
        # Serves as the source image in this case
        "image_id": image.id,

        # Path to local generated image
        "image_path": path_string,

        # OR you can provide PIL.Image object
        "pil_image": pil_image,

        # Current training step
        "step": step,

        # List of detections
        "detections": [
            {
                # Label id from dataset.annotation_labels
                "label_id": res.label_id,

                # Bounding box of current detection
                "bounding_box": res.bounding_box,
            }
        ]
    })
training.save_validation_images(validation_images_batch)
In that case mpVision will show generated image as a preview. You can also skip detections output in those cases if it does not required when you generate a new image based on provided validation image.
:::note Image Classification Training
In case when you run image classification process, you should provide output classification with bounding_box value, but with whole image as a detection: [0, 0, 1, 1], i.e.:
validation_images_batch.append({
    # Serves as the source image in this case
    "image_id": image.id,

    # Path to local generated image
    "image_path": path_string,

    # OR you can provide PIL.Image object
    "pil_image": pil_image,

    # Current training step
    "step": step,

    # List of detections
    "detections": [
        {
            # Label id from dataset.annotation_labels
            "label_id": res.label_id,

            # Whole image is classified, so the bounding box is full image size
            "bounding_box": [0, 0, 1, 1],
        }
    ]
})
:::
More detailed description for both metrcis and validation images functions you can find in the corresponding references section
Training session completion
When your training session is complete, you should notify mpVision backend about it, so users are aware that they can now use and test their models. When you request a training dataset, mpVision will change it's training status to IN_PROGRESS and will monitor for completion information and possible errors within your training process.
To report session completion, you can use mp_sdk.training.complete_training_session function. That function does not require any input arguments if you use it within same process where you have requested training dataset:
from mp_sdk import training


# .... Your code here ....

# Initiate training process
for step, model in enumerate(torch.dataset):
    # Your training loss functions and validation
    # logic goes here
    results = model.run()

# Now, when training session is complete, we can change it's status in mpVision
training.complete_session()
You will see that training session, that is associated with this dataset, changed it's status to complete and you will be able to observe training results and related outputs.
For now, let's go ahead and check out how we export model that we have just trained to users library using both SDK and mpVision UI.